Gmail setup wizard

Connect Gmail once and send lead emails reliably

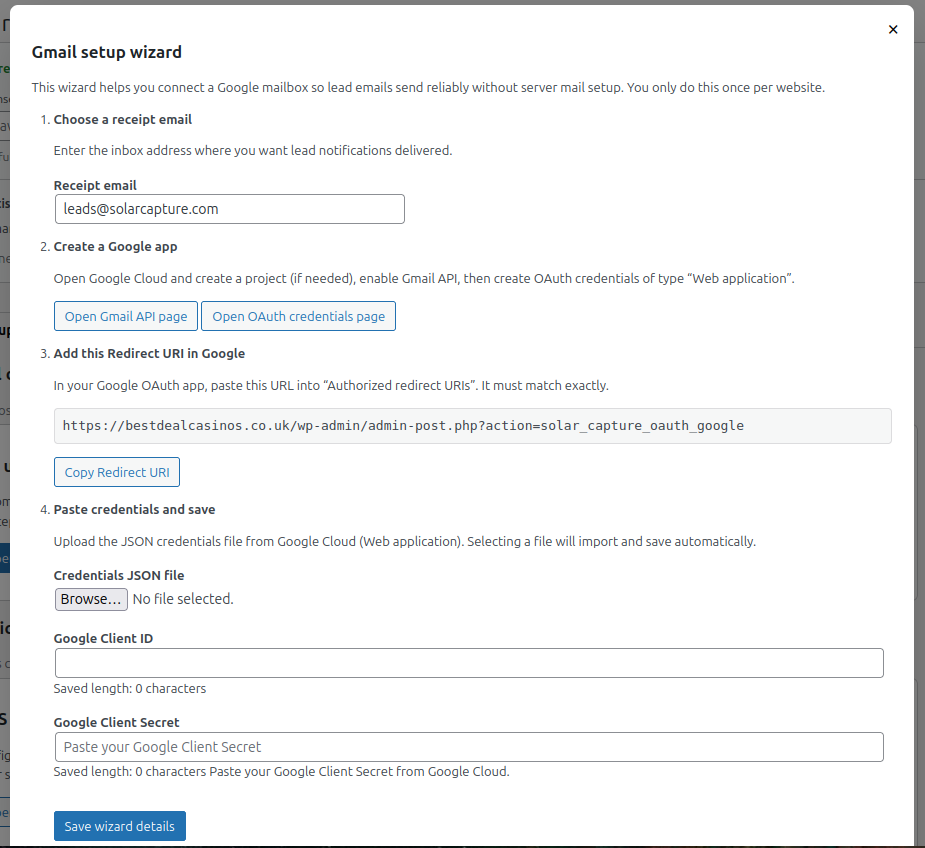
This guide walks through the full Solar Capture Gmail setup flow. You will create a Google app, add the exact redirect URL, paste the credentials into the wizard, and then connect the correct Gmail account.

One-time setup Google OAuth Web application client
Redirect URI you must register in Google Cloud

About the domain in this guide: We use example.co.uk only as a readable placeholder in this document. It is not the value you should copy unless that really is your site. Use the hostname from your WordPress admin URL, or copy the redirect URI shown inside the Solar Capture wizard on your site — those always match your live domain.

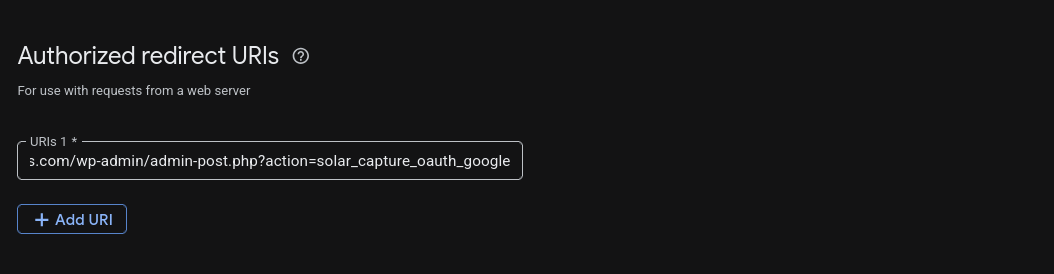
Paste the real URI into Google Cloud under Authorized redirect URIs. It must match the wizard exactly.

https://example.co.uk/wp-admin/admin-post.php?action=solar_capture_oauth_google

The line above illustrates the path and query string only; swap example.co.uk for your site's domain.

1Enable Gmail API
2Create OAuth client
3Paste credentials and connect
Wizard overview Receipt email + credentials + connect
Gmail setup wizard overview

Part 1

Set up Google Cloud

Before the plugin can connect to Gmail, Google Cloud needs a project with the Gmail API enabled and an OAuth client of type Web application. Follow these steps in order.

1

Choose the receipt email

In the wizard, enter the inbox address where lead notifications should arrive.

  • Use the mailbox you want to receive new lead notifications.
  • Example shown: leads@solarcapture.com.
Wizard showing receipt email field
Start in the Gmail setup wizard and fill in the receipt email field.
2

Enable the Gmail API

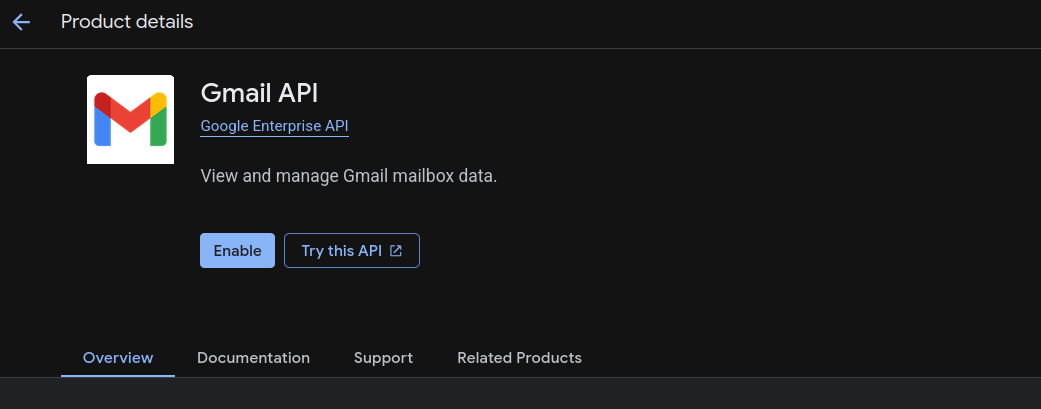
Open the Gmail API page from the wizard and click Enable for your project.

Gmail API page in Google Cloud
The Gmail API must be enabled before you create OAuth credentials.
3

Open the Credentials page

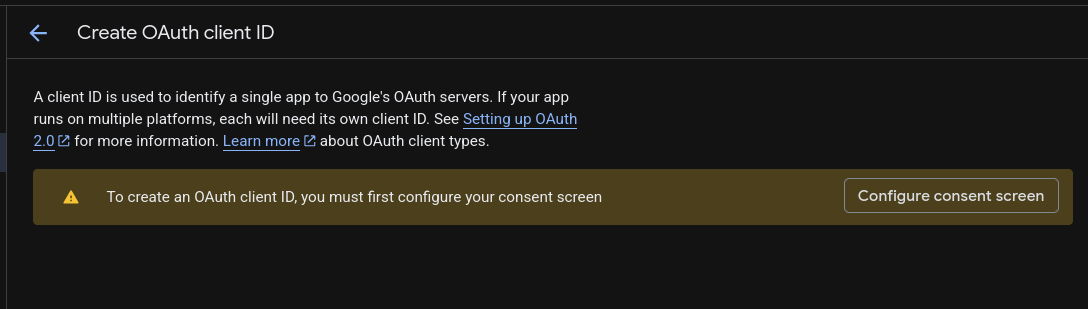
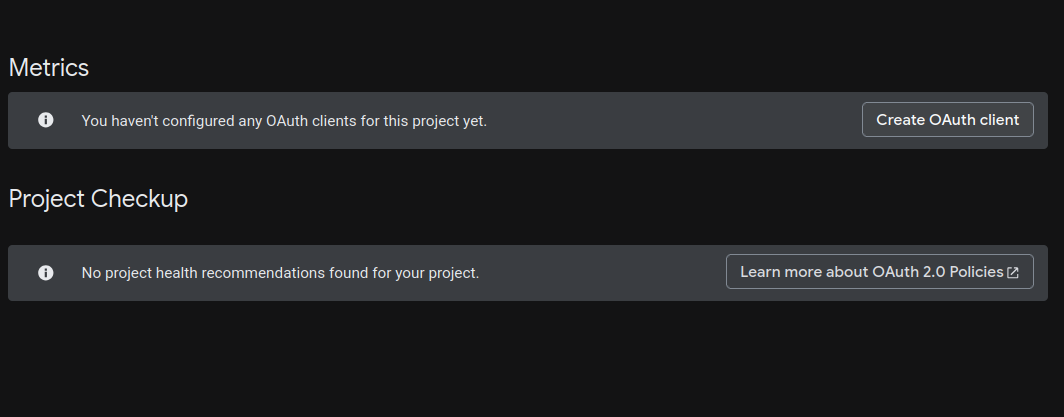
Go to APIs & Services → Credentials, then click Create credentials.

Credentials page in Google Cloud
The Google Cloud credentials page.
Create credentials dropdown with OAuth client ID selected
Select OAuth client ID, not API key or service account.
4

Configure the consent screen

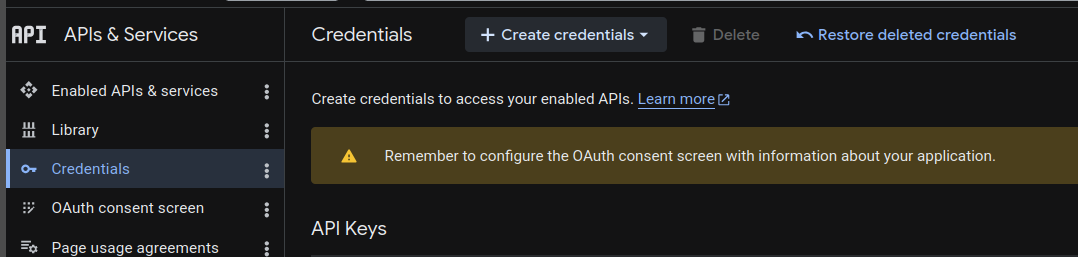
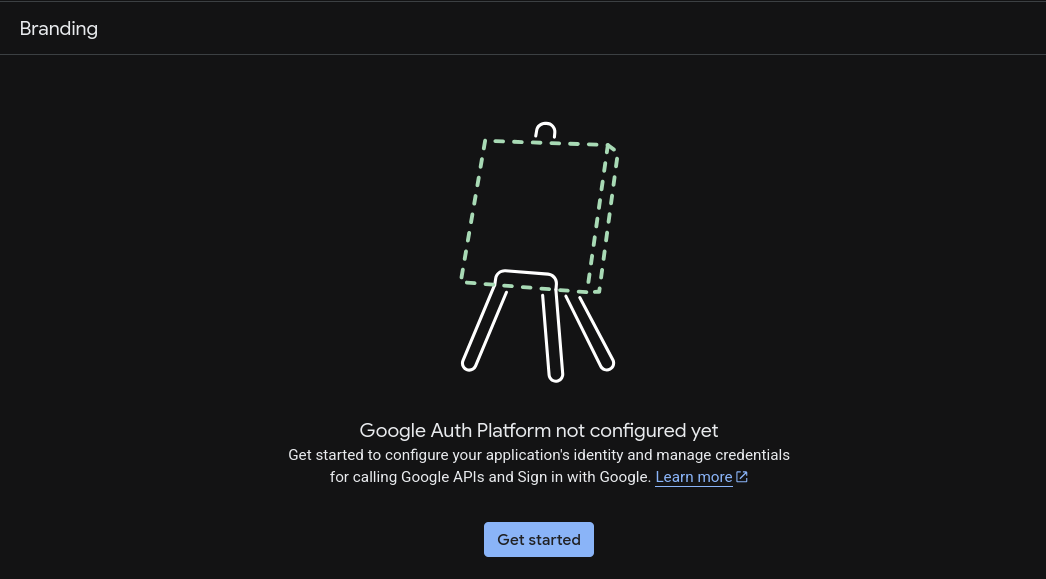
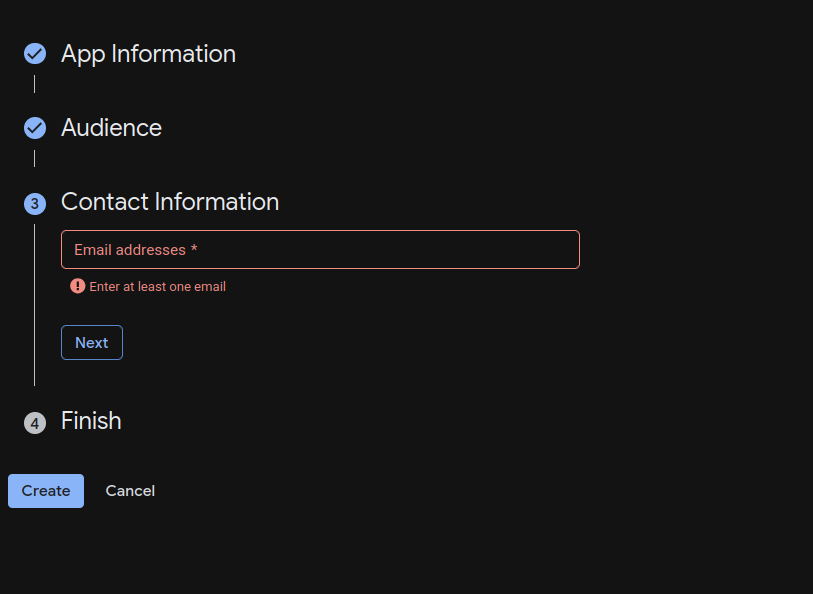
If Google says the consent screen must be configured first, complete that part before creating the OAuth client.

  • Add an app name and support email.
  • Choose Internal for Google Workspace-only use, or External if needed.
  • Add at least one contact email address.
OAuth client creation requires consent screen
Google may ask you to configure the OAuth consent screen first.
Google Auth Platform not configured yet
Click Get started to begin the Google Auth Platform setup.
Consent screen app information step
Enter the app name and support email.
Audience selection
Choose the audience setting that fits your Google account setup.
Contact information step requiring at least one email address
Add at least one contact email so you can continue.
Consent screen finish step
Accept the policy checkbox and finish the consent screen setup.
5

Create the OAuth client

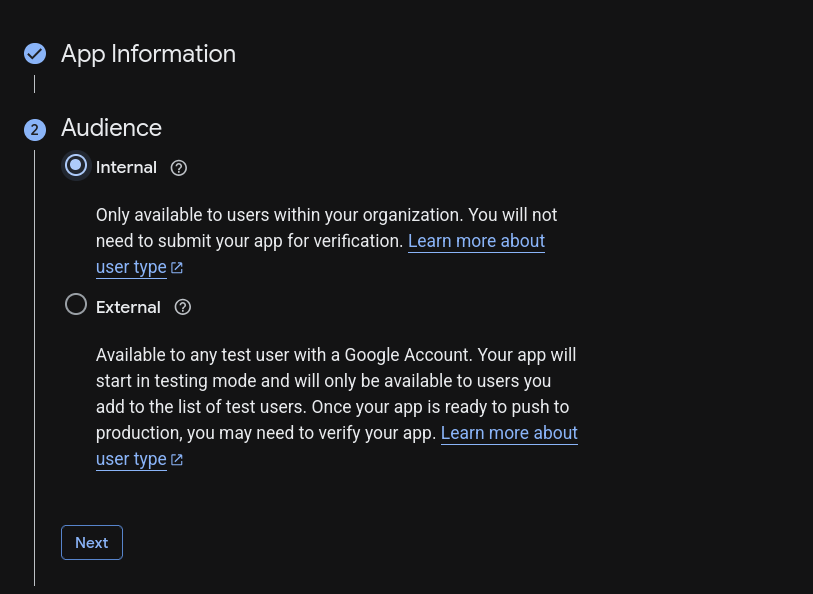
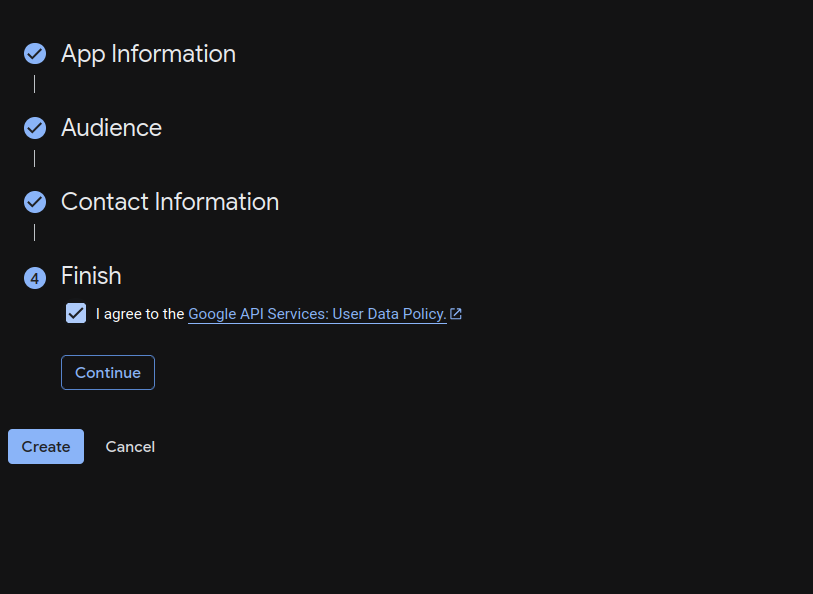
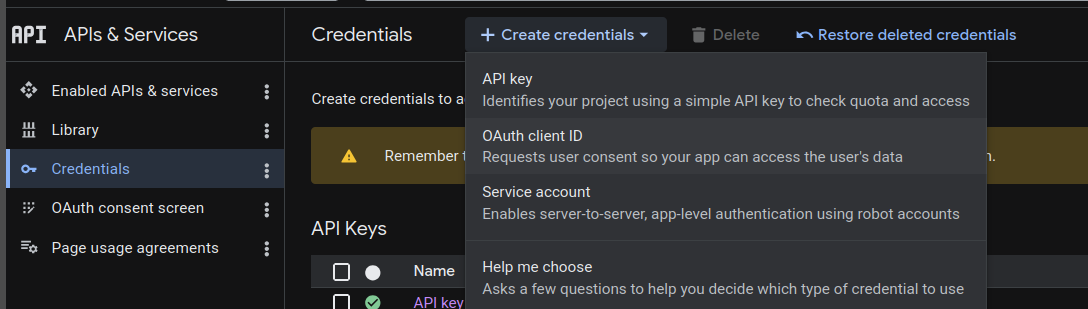
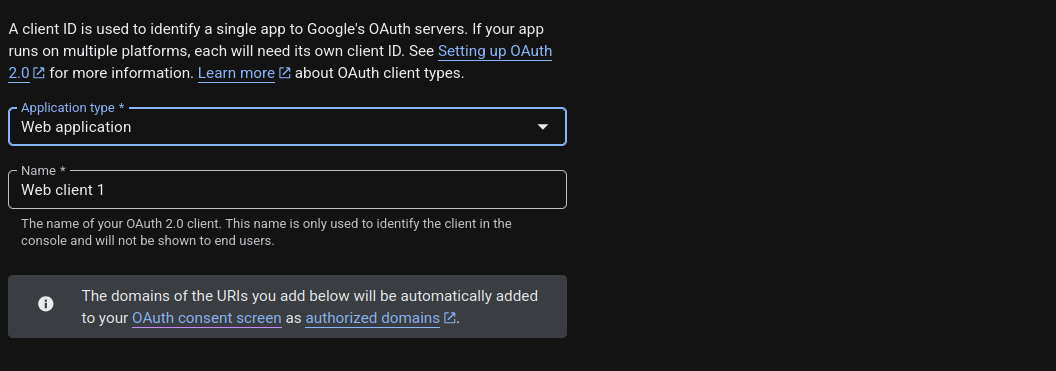
Once the consent screen is ready, create the OAuth client and choose Web application as the application type.

Create OAuth client button in Google Cloud
Click Create OAuth client.
OAuth client form showing Web application type
Use Web application for this setup.
6

Add the redirect URI

In the OAuth client form, paste the redirect URI from your Solar Capture wizard into Authorized redirect URIs. (example.co.uk below is only for illustration — use your real domain.)

https://example.co.uk/wp-admin/admin-post.php?action=solar_capture_oauth_google
Authorized redirect URIs field with plugin redirect URL entered
Paste the exact redirect URI from the plugin wizard into Google Cloud.
7

Collect the credentials

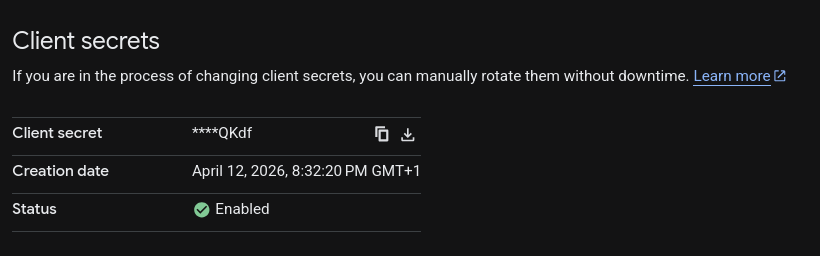
After Google creates the OAuth client, copy the client ID, download the JSON file, and open the client details if you need the client secret.

OAuth client created dialog with download JSON option
Google shows a success dialog where you can download the JSON file.
OAuth client list showing the newly created web client
Your new web application client appears in the client list.
Client secret details panel in Google Cloud
Open the client details to copy the client secret if needed.

Part 2

Paste the credentials into the wizard

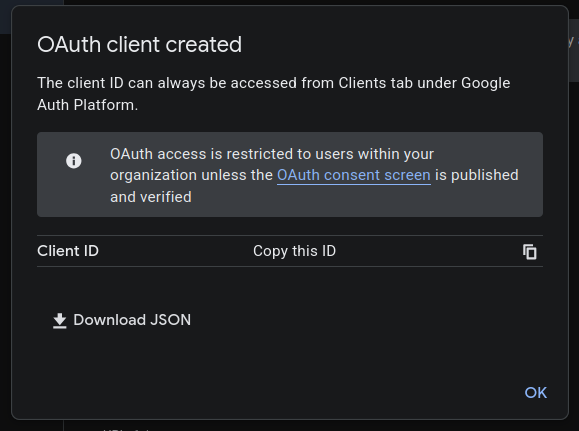
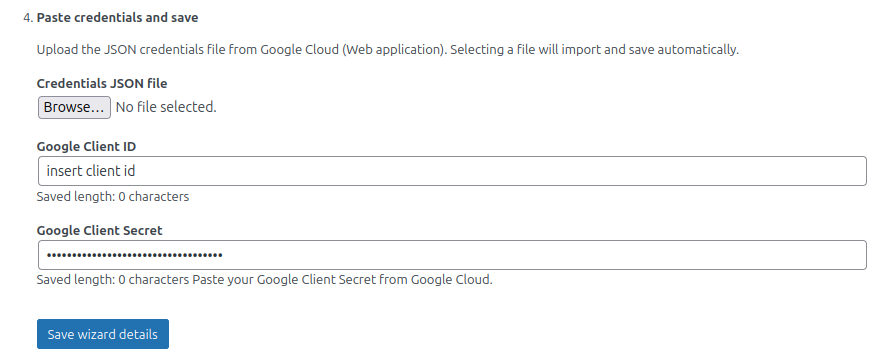
Now return to the Solar Capture wizard. You can either upload the JSON credentials file or paste the client ID and client secret manually.

8

Paste credentials and save

Upload the JSON credentials file from Google Cloud, or paste the values into these fields:

  • Google Client ID
  • Google Client Secret

Then click Save wizard details.

Wizard with client ID and client secret entered and save button visible
Paste the client ID and client secret, or upload the JSON file, then click Save wizard details.

Part 3

Connect Google and approve access

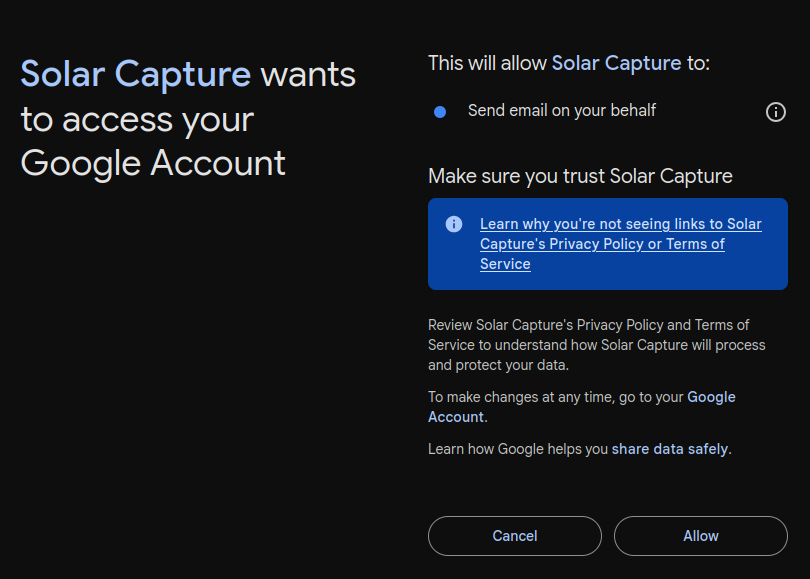
After saving the wizard details, connect the correct Gmail account and complete the Google permission screens.

9

Choose the appropriate Gmail account

Click the connect button in the wizard. When Google opens, choose the Gmail account you want this website to use.

Then select Continue.

Google sign-in screen showing Continue button
Select the appropriate Gmail account, then click Continue.
10

Allow access

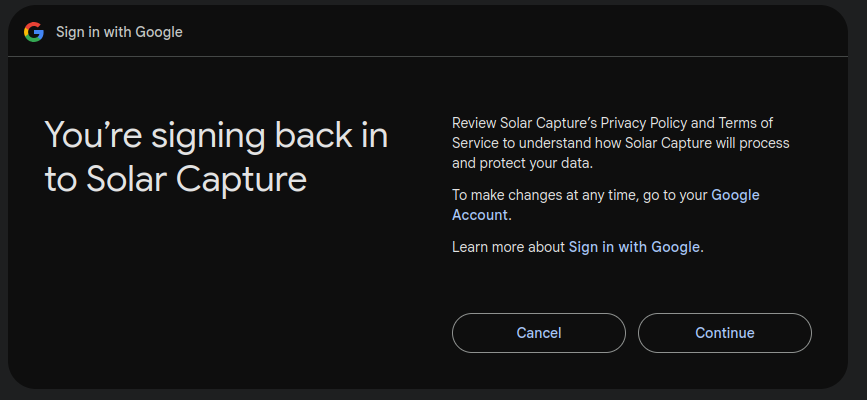
Google will show the Solar Capture permission screen. Review it and click Allow to finish the connection.

Google permissions screen showing Allow button
Click Allow so Solar Capture can access the Gmail account for sending email on your behalf.

Done

Your mail setup is complete

11

Congratulations

You have now set up mail for Solar Capture.

Next, you may want to set up the Google Sheets integration.